Site Manager
| Management > Site Manager |
The Site Manager allows you to create and edit the sites. By default, the users of Administrator and Manager type have the permissions to perform these operations.
Please contact your G Element representative to obtain a copy of the exported model.
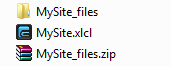
1. Let's say you have named the exported model as "MySite". Then, you will see these two items in the output directory:

2. Zip the MySite_files folder as MySite_files.zip. Now, you have the following three items:
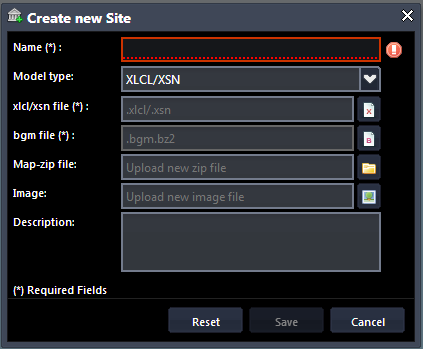
3. Click the "Add Site" button, which is located at the bottom-left corner of the Site Manager, and a window that is illustrated as below will appear.
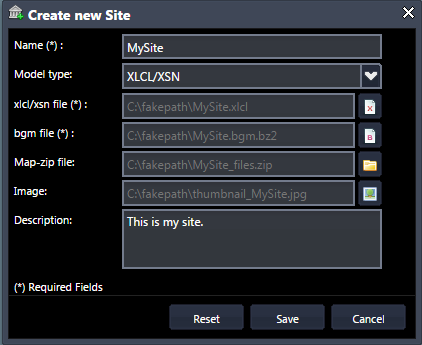
4. Select the files that are generated in previous steps in the corresponding field, as illustrated below.
Notes:
5. Click the "Save" to create the site. You can reset all the fields by clicking the "Reset", while clicking the "Cancel" will cease the creation of the site.
To edit an existing site, you first need to click the thumbnail that represents the site in the Site Manager to bring out a window as shown below, where you can perform your edit operations.

In this window, you can remove the site by clicking the  button, while you can edit the site by clicking the
  button. The interface for editing an existing site is the same as that of creating the site.
Note that a deleted site cannot be restored; if you want to add a profile to this site, please use Profile Manager.
 |
You will encounter a failure when adding a site if you have used up the licensed quota. You are encouraged to check the License Manager before adding a site. |